Best Cookie Recipe Ever! - A Melhor receita de Cookies do Mundo!


This is a very simple classic chocolate chips cookie recipe, but delicious nonetheless. I got it through a Canadian friend, and I believe good things are meant to be shared, so without further ado, here it is!

Ingredients:

  • 1 cup butter
  • ¾ cup sugar
  • 1 ¼ cups brown sugar
  • 2 eggs
  • 2 teaspoons vanilla extract
  • 2 ½ cups all purpose flour
  • 1 teaspoons baking powder
  • 1 teaspoon baking soda
  • 2 ½ cups chocolate chips
  • A pinch of salt


Instructions:
In large bowl cream sugar and butter until light.
Beat in eggs and vanilla.
Sift together the flour, salt, baking powder, baking soda. Mix and add the chocolate chips.
Shape into balls, spread on cooking tray.
Bake at 350F for about 10 minutes, or until edges are lightly brown.

Karen’s hints


  • Too much baking soda will make your cookies with a strange taste, kinda bitter.
  • Teflon coated trays are a must if you want to be practical. Use an appropriate spatula.
  • You never bake until the end. The secret is to get them off the oven when the middle of the cookie is still soft, only the edges must be a little darker
  • Temperatures must be medium-low, too low will take melt everything and take forever to bake, too hot will burn everything, you must know your oven. I know mine must have a bipolar disorder, it’s never stable, so I check it after the first 12 minutes and every 2 minutes after that.
  • Store it in a closed container for extra chewiness later on.
  • Don’t pig out! And remember to leave your comment below! <3 span="">

Purple Bag - Simplicity Pattern

https://karentiemy.com/2018/01/16/diy-fabric-bags-and-sewing-project-ideas/


Hi, we moved! You can find the same post on the link above! see you there!


Horse - Cavalo - Hideo Komatsu


It's been a while, I know, I've been busy but I haven't stopped crafting!!! Here goes a horse model by Hideo Komatsu, I really liked this pic!
Inspired by A Pale Horse Named Death - awesome band!!!

Patchwork Owl Bag - Bolsa Coruja em Patchwork

https://karentiemy.com/2018/01/16/diy-fabric-bags-and-sewing-project-ideas/


Hi, we moved! You can find the same post on the link above! see you there!


Casserole Carrier + Tutorial - Porta travessa + Pap


So, I had this party to go last week and everybody had to take something to eat. I really dread cooking, the 2 only things I know how to cook are a sardine pie and chocolate chip cookies. And, of course, they were the 2 things I took to the party. While baking them, I found that it would be a great opportunity for me to make a casserole carrier, I had already seen some pretty nice models online and decided to give a try.

The first model I checked was one from a book called Pretty Little Cozies, but the problem was that the cozy size should be made for a specific casserole, and I wanted smth more versatile. And then, Google to the rescue, I stumbled on this model and thought it would be easy and fast enough to make it, no tutorial needed, just pics would do. 

This one was made using a 50cm square, because as I said before, I'm no cook, so there is nothing too big in my kitchen, I think a 60cm square would be more suitable to most people.

Semana passada eu tive uma festinha para ir, daquelas que cada um leva um doce e/ou um salgado. Eu tenho ojeriza à cozinha, só sei fazer duas coisas decentemente: torta salgada de sardinha e cookie de baunilha com gotas de chocolate. E já que não tinha muita opção mesmo, foi isso que eu fiz pra levar para a festa. Enquanto o forno trabalhava, me ocorreu que era uma boa oportunidade para craftar, então resolvi fazer um porta travessa, lembro que já tinha visto alguns modelos em algum lugar e resolvi tentar. 

O primeiro modelo era de um livro muito fofo chamado Pretty Little Cozies, só que o porta travessa teria que ser feito para uma travessa específica, por conta do tamanho, assim como a maioria do que vi na internet, e eu queria uma coisa mais versátil. Foi quando vi esse modelo no Google, achei bem simples e fácil, não ia precisar de tutorial nem nada, deu pra entender quando vi a fotinho.

Esse projeto foi feito com um quadrado de 50 cm, pq já que eu não cozinho, aqui em casa não tem nenhuma travessa muito grande, e tb pq era o que tinha sobrando na gaveta de tecido, rs. Acho que para travessas maiores um quadrado de 60cm fica de bom tamanho.

My lame pic tutorial :-)
Meu tutorial tosquinho :-)


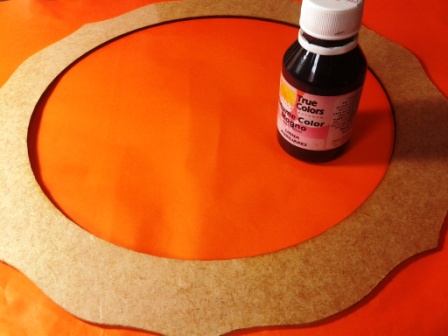
As you can see in the pic, this project is quite easy. You need to cut 2 squares, I cut mine 50cm, but I guess you can adapt according to your needs. 60cm would be big enough for most casseroles, dishes and trays, I guess. I used some quilting batting inside so it will keep the food warm, but I don't think it's crucial. It was a piece I had as a leftover from my last project, you can use interlining, felt, whatever you have at home. Sew both squares with right sides together and leave a small opening to turn it the right way. Cut a strap a little shorter than the diagonal distance between the two corners of the square and sew it on the corners, MANY TIMES so it won't rip.

Esse projeto é super simples, acho que dá para seguir sem molde, só com a foto. Corte 2 quadrados, eu cortei com 50 cm pq aqui em casa não nem nenhuma mega bandeja, então 50 ficou de bom tamanho. 60 cm  vai dar certo para a maioria das bandejas, formas, travessas, pratos, etc. Eu usei manta acrílica no meio, mas aqui em casa só tinha a manta grossa, daquela de edredon, rs, ficou MUITO fofo, hahaha, não deu nem pra quiltar eu só passei 2 diagonais para segurar no lugar, quando ficar mais usadinha tento quiltar de novo... Se vc não tiver manta em casa, não esquente a cabeça, é opcional, vc pode usar um quadrado de outro tecido se quiser, ou feltro, ou nada. depois, faça uma alça um pouco menor do que a distância entre os dois cantos do quadrado na vertical e costure MUITAS VEZES para não correr o risco de arrebentar.


On the other corners, sew 2 metal rings and overlap them like this over the strap when you use your carrier...

Nos outros 2 cantos, costure 2 anéis de metal e coloque um sobre o outro dessa maneira quando for usar seu porta travessa...


Pass the strap through the hoops and pull as far as necessary...

Passe a alça por dentro das argolas e puxe até onde der...


TAH DAH!!! 

Pros: 

  • It's super cute.
  • It adapts to smaller plates and also to bigger trays, because you can use it even if the casserole is bigger than the carrier (the corners of the casserole will be poking out of the carrier, careful if it's a glass casserole)
  • You can also carry round plates in it.
  • If quilted, it will keep your food warm.
  • The balance point and handle are located in the middle of the casserole, so it won't turn over. Girls, it's husband-proof!!!

I hope you like it, if you give it a try, don't forget to leave a message on the comments!!!

Prós: 

  • É super fofa.
  • Adaptável para diversos tamanhos de pratos, mesmo que a travessa seja maior que o porta-travessa (neste caso, cuidado com travessas de vidro, pois os cantinhos vão ficar desprotegidos)
  • Vc pode tb carrregar travessas redondas e pratos
  • Se for quiltado, vai manter a comidinha bem quentinha,
  • O ponto de equilíbrio e as alça se encontram bem no meio da travessa, então não precisa se preocupar em virar tudo! Gente, é à prova de marido!!!


Espero que tenham gostado, e se vc resolver tentar, não se esqueça de deixar o end do seu blog nos comentários!!!!

MDF - Bday Tea Box - Caixa de chá tema: aniversário


Essa caixinha de chá ficou rolando pra lá e pra cá aqui em casa, já tinha passado betume True Colors na parte de dentro, mas não sabia o que fazer para decorar a parte de fora... foi quando vi o desafio do blog dos desafios e resolvi participar! :-) Achei esse retalho de papel de scrapbooking e aproveitei, acabei gostado da paleta de cores, acho que eu nunca misturaria roxo e azul se não fosse por esse papel :-) Acho que sou meio monocromática demais, rs...

Another MDF box, this one I created for a challenge blog, the theme of the week is 'birthday'. I used plenty of scrapbooking paper scraps, rickrack, buttons and ribbons, nothing too different from what I've already done, except maybe for the color palette, the paper made me mix purple and blue, two colors that even though are both 'cold', I don't think I'd use them both in a project unless I had to. Hm, talk about color comfort zone, huh? :-)


Scrap Decor - Paper Flower Wreath - Guirlanda de Flores de Papel


Eu me lembro que quando ouvi falar sobre scrapbooking pela 1a vez, sei lá quando foi, achei tudo muito lindo mas tb muito caro. Mais tarde, uma amiga de crafts disse que não precisamos gastar muito para fazer coisas bonitas e legais, é só saber misturar. A guirlanda aí de cima começou com a base reaproveitada da guirlanda do natal passado, e as cinco flores foram feitas a partir de uns enfeites que comprei na Lojasmel, daqueles bem simples, made in China e tal. Apliquei mais uns cortes de flores nos miolinhos para dar mais volume nas camadas, coloquei umas fitinhas da 25 de março e voilá! Não usei carimbeira para distressar as bordas, nem papel de scrapbook caro (esses coloridos são de um pacote de folhas coloridas que vende na Kalunga por menos de 15 reais), nem carimbo, nem pedraria, nem sianinha, e adorei o resultado! Ficou bem diferente das coisas que eu geralmente faço, mas gostei de usar cores berrantes, pra variar um pouco :-)

Who said you need to spend a lot of money with expensive patterned cardstock, gems, stamps and sequins to create something nice? I got the big flowers for a pretty reasonable price here in Brazil, I'm sure you must know a place where tey sell these cheap made-in-china stuff, I upcycled the base wreath I had used last Christmas, added some flower cuts as extra layers, a couple of buttons, ribbons and voilá! A new wreath for my door!


Origami Magazine - Revista de Origami - 8


Saiu a edição 27 da revista Origami pela editora Minuano, vc pode comprar pelo site deles ou em qqr banca de jornal! Eu fiz a caixinha porta doce e a esfinge que aparecem na capa.

Papercraft house - Bedroom


Another room! The last one was the bathroom, this time, the bedroom! From the same site I've mentioned before, I hope you enjoy it!!!

Wanna try? Click here!

Jedi Master Yoda Origami - Fumiaki Kawahata


To be completely honest, I'm not THAT into Star Wars - I'm more of a sword and sorcery girl ;-) - but a dare is a dare, and a friend asked me on Facebook if I could handle it, and here it is! I had no better paper to make it, so that's my Yoda with chlorophyll withdraw, lol. 

Wanna try? Click here for the diagram.

Um amigo me intimou no Facebook, aí eu tive que fazer, né? Não é muito difícil, mas não dá para usar um papel mto grosso, por causa da cabeça e do cajado. Esse eu fiz com tissue foil, não me lembro bem do tamanho, acho que uns 20x20cm, mais ou menos.

Quer encarar? Clique aqui para ver o diagrama

Pássaros de Origami / Origami birds by Kunihiko Kasarara

All the models on this post are from the book Creative Origami, by origami master Kunihiko Kasahara. He does not make super complex models, but you can see they are all very elegant. I love his design, I think it's quite difficult to find models that are both simple and beautiful like these ones. 

Todos esses modelos são do livro Creative Origami, do meste Kunihiko Kasahara. Eu gosto muito de dobrar diagramas super-mega-hiper-complexos, mas acho que é mais difícil ainda criar um modelo que tenha poucas dobras e consiga resultar em beleza e elegância ao mesmo tempo, como os criados por Kasahara. 


Flying stork / Cegonha voando 

Duck / Pato

 Swam / Cisne

 Duckling / Patinho

Mandarin ducks / Patos mandarin

 Eagle / Águia

Pelican / Pelicano

Pheasant / Faisão

Papercraft house - Bathroom


Para todos que adoram papercraft como eu, esse é o segundo modelo do mesmo site japonês que eu já postei há um tempo atrás. Dessa vez, é o banheiro da casa, vamos ver se eu consigo fazer todos os cômodos! Dica: Se vc não quer um modelo gigantesco, imprima em 50% do tamanho do original, fica um tamanho razoável para cortar e colar.

Quer tentar? Clique aqui

For the ones who like papercraft like me, this is the second model I post from the same Japanese website I've mentioned some time ago. They have the whole papercraft house, bathroom, living room, bedroom and so on. I hope I manage to make them all and post them here for you! Tip: Unless you're going for a pretty big model, print it on 50%. The final size will be big enough to cut and glue, and you'll save some paper and toner/ink.

Wanna try? Click here

Eagle / Águia, by Joseph Wu

18 cm square origami paper

Such an awesome model! Of course it's not a begginers model, but the steps are clear and easy, not that hard if you know the basics :-)

Scrap decor MDF - Birdcage box

https://karentiemy.com/2018/01/21/diy-vintage-boxes/

hey there, we have a new home! check the link above to check it out!

Pink Tote

https://karentiemy.com/2018/01/16/diy-fabric-bags-and-sewing-project-ideas/


Hi, we moved! You can find the same post on the link above! see you there!

Squirrel - Esquilo - Perry Bailey


Diagrama / Diagram
20x20 cm double-sided origami paper.

Related Posts Plugin for WordPress, Blogger...